The Bigger Picture

Tying the knot means leaving single-hood and investing your time, effort, future, and money with someone for the rest of your life. It's one heck of a ride and a challenging test of patience, forgiveness, understanding, and faith.

The Bigger Picture

Tying the knot means leaving single-hood and investing your time, effort, future, and money with someone for the rest of your life. It's one heck of a ride and a challenging test of patience, forgiveness, understanding, and faith.

Creativity Defies the Common

Your wedding deserves to mirror your story. It's a celebration of what you and your partner have gone through and will go through.

Creativity Defies the Common

Your wedding deserves to mirror your story. It's a celebration of what you and your partner have gone through and will go through.

Memoirs

Meeting with your closest friends and family members is all about sharing what's special.

Memoirs

Meeting with your closest friends and family members is all about sharing what's special.

A Vow of Forever

Let us start with forever, Love.

A Vow of Forever

Let us start with forever, Love.

Friday, February 17, 2012

Days 27-33: DIY Hair Do

A great peso-saving quirky idea is to know exactly what you want to look like on your wedding day. To be fair, a lot of Western brides who opt for rustic barn weddings make it a point to have their "do" and make-up made by themselves. 


Yes, in my vain effort to look for great ideas to shorten our expenses for our allotted budget, I've stumbled upon this great blog from a lady named Cinthia Truong. She has a fantastic sense of hair styling that the fashion goner in me felt hope will spark once I try and follow her lead. And so I did. Of course, my attempt to doing her "do" was a major fail but I'm not giving up on doing it allover again.


Thus, a week of hair styling for my 365 DIY challenge begun!

Day 27: Hair with a Twist. This style is perfect for that clean and chic cocktail look. Twisting the hair in this manner is super easy and unique. Goodbye common curls, hello twisted hair!


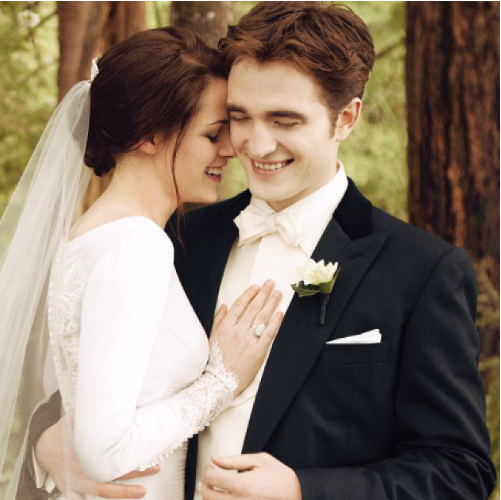
Day 28: Princess Wedding Do. Want to look like a Renaissance woman or a Medieval princess? Go ahead and try this braiding technique and hair puffing! This one is great for that elegant youthful look a bride hopes for on her wedding day.


Day 29: Bohemian Do. I, personally, am a huge fan of curls; however, I would want mine to be spiced up and not look that familiar. This tutorial seemed to be perfect for my penchant. The romantic bohemian braids prepared in this vid is really easy to follow. I'm yet to perfect the "do," though. *wink* 


Day 30: Romantic Curly Bow. This will have to be my favorite style among the bunch. For one, it really looks sophisticated. Likewise, it looks lovely and unique!


Day 31: Quick and Easy Bun. A bride-on-the-go might want to have a quick and easy wraparound technique to utilize in styling her hair. This "do" is simple, yet it looks a tad bit complicated. 


Day 32: Prom Bride. For those who want a fresh-looking "up-do," this tutorial is nothing but perfection. The braiding technique is really simple that this "do" is also great for the prom night look. 


Day 33: Cute Top Hat Do. For those creative brides out there, try this mini top hat do with your very offbeat attire. Lovely! 


Source: Cinthia Truong
Posted on 2/17/12 at 6:00 PM

Thursday, February 9, 2012

In the Scope: OsepMimi Photography

They say the Philippines is home to many talented artists. True to this saying, a team of briliant and quick-witted photographers is becoming more and more famous among soon-to-be husbands and wives. Osep and Mimi Photography has been a favorite of budget-conscious brides-to-be.

The duo features colorful non-traditional shots that magnifies the beauty and serenity of any event. My friend, Norly, got their services last week. I'll have to say the pics are nice (saw them on his blog). The team is actually a good choice, but our budget wouldn't permit us to have them graciously take our official pics.


Contact Nos.: 0947-8128910
Contact Person: Joseph Rey Villaruz
E-mail: 
osepmimiphoto@gmail.com

More info at The Osep and Mimi House

Posted on 2/10/12 at 4:00AM

Days 24-26: Cheap Invi Ideas

Doing your own invitation is probably a very good budget-wise decision for everyone whose into cutting their wedding expenses. For one, wedding invites can be crafted accordingly. Also, there are tons and tons of available sources one can find online and off-shelves.

Here are some nifty ideas I grabbed online! Credits are not mine by the way.

Day 24: Lady Bug Invi Idea
This is a very helpful guide for couples who wish to incorporate the "love bug" theme in their wedding. Likewise, this is perfect for those who have red and black as their motif. I kind of like the idea of using this one; however, we're on the black and yello shades and I doubt that a black and yellow lady bug would look nice (though there really are black and yellow lady bugs)!

Day 25: The Petal Card
For brides and grooms that are having a floral-themed wedding, this tutorial I've nabbed online is one great treat! It basically provides a step-by-step guide as to how to create a petal card. Very easy to follow yet oozing with creativity!

Day 26: Pocketfold Envelops
Using pocketfold envelops has never been outdated. Couples may use these over and over again without hurting much of their financial pie. It's really simple and can be a great DIY bonding activity for soon-to-be husbands and wives.
Posted on 2/10/12 at 7:00 AM

Would Be Venues Part 1

It's already 11 months before our supposed wedding event but we're left without any progress.

Our supposed progress of finding a church and reception venue has crumbled with the down with fate with Makati Parks and Garden. Had the City of Makati's Office decided not to renovate the Pavilion, we wouldn't have this problem.


Since this is the case, we are putting our thinking caps and wander boots on for the enth time to find the venues fit for our budget and taste. To name a few of our forthcoming sojourn, here are some of our target venues:


Sta. Ana, Manila {The Proximate Candidates}
Sta. Ana Church: Our Lady of the Abandoned Parish
Address: Pedro Gil St., Santa Ana, 1009 Manila, Philippines
Telefax: +63 2 564-4203
Vicariate: Holy Family
Feastday: May 12

Taken from Dontrivino
 The facade worth capturing

Beautiful. I may want to walk down this old church.

Memories of the past


The same long-stretched altar where my mom and dad walked at during their wedding rites. Am I fated to walk down the same aisle?


Pros:
1. This is very old-looking perfect for the shutters to capture.
2. The ambiance inside is very solemn.
3. I grew up wandering in and around the church's premise until I've started attending services at the Holy Cross Parish near Francis' home.
4. Parking space is really plenty.
5. Near the residence of my and Francis' relatives. Easy commute!


Cons:
1. Difficult to find for those from QC area.
2. The roads and streets leading to this church are not that spacious. Traffic might be a problem for some attendees.


Jardin 'd Isabel


 Taken from Pahinaphotos


Pros:
1. Near Sta. Ana Church; hence, the attendees will no longer have to travel (or be lost on their way) to get to the venue.
2. The ambiance is clean and very private. Great for intimate parties!


Con:
The residential area has a lot of bystanders, which may make other attendees turned off.
*** Haven't seen yet so I'll just update in the future. 


Aerial view. Oooh YELLOW! Just like our color!

A treehouse?!? Great! Now, I'm starting to root for this venue!


A hut definitely accentuates the entire reception area.


Ramon Magsaysay Hall, Paco, Adamson Church {The Conventional Choices}
Adamson Church: San Vicente de Paul ParishAddress: 959 San Marcelino St., Ermita, Manila, Philippines
Postal Address: P.O. Box 2013 , 1060 Manila, Philippines
Telefax: +63 2 525-7853
Vicariate: Nuestra Señora de Guia
Feastday: September 27


The exterior. Taken from Senor Enrique

Pros:
1. Long aisle means long bridal march.
2. Breezy interior ambiance.
3. Bright lighting.
4. Spacious parking area.


Cons: 
1. Serves as an adventure for people who are unfamiliar with this place.
2. Might be a little bit more challenging to commute to this place.


Snatched from Glitchline


Ramon Magsaysay Hall, Roxas Blvd.
1680 cor J. Quintos St. Roxas Blvd., Malate
Tel.: 521.3166
The hall, naked to the public eye


 RMCH with sophisticated styling
Pros:
1. Enclosed so any change in the weather will not make the ocassion sour.
2. Wide and easy to style.


Cons:
1. A bit pricey at around 20k for us.
2. Very popular so the competion to win over this is quite close.


Paco Park Church and Garden:  St. Pancratius Chapel
The antique cradle inside the walled haven of a busy city


Pros:
1. Very solemn and peaceful inside the park.
2. The parks serves as a photo-worth backdrop for the picture-taking.


Cons:
1. Might be difficult to visit for other attendees.
2. A popular choice among many brides-to-be.
3. The aisle is too short.


Inside the antique facade lies a very solemn and intimate place for exchanges of vows.


Now, we're yet to visit each of these places as we continue the chase for the 2013 venue of our nuptial. Hoorah!!!  

*** These pictures are not mine. Copyright is reserved to the rightful owners. Thanks Mr. Google!
Posted on 2/9/12 at 5:03 AM

Tuesday, February 7, 2012

Days 21-23: Origami Art to Fancy Any Wedding

Francis and I are so decided in having a DIY-ed wedding. Though he doesn't really say much when it comes to the venue selection, he always manages to put his insight on the table. It's rather odd that we haven't torn our heads off at this point in time with our usual indecisiveness and differences.i

We can (in fact) go on and on regarding how ravishing some DIY projects are. For once, I want to incorporate a very unique guestbook idea and perfect the art of fabric and paper flower making. On top of this, we've really wanted our wedding to center on our love story and creativity. Thus, paper cranes came to my mind!

Paper cranes are very hopefulfilling for many Asians. They say that if you religiously fold 1000 paper cranes, then your true heart's desires will become a reality. Sounds snazzy, right? Well, this seems to be a very interesting adornment in the reception (and probably a sound theme to implore in our celebration).

Cool Crane! Too bad the photo and this aren't mine.


In lieu of this, I've selected three origami art as DIY crafts for couples:

Day 21: Easy-to-Follow Tutorial for the Paper Cranes

Day 22: Paper can be roses too.
Day 23: Making paper butterflies is qiute relaxing.
Life, I mean, I  better start looking for more tutorials before it's too late. Gaahhh!!! Wedding gaga over DIY projects!
Posted on 2/07/2012 at 3:00AM

Updates: Our February Calendar

Welcome me back from my hiatus!  Yay! So, I was a little bit depressed due in part to the wedding date and reception brouhahas. I'm manic right now! Mr. Google has been a pretty good helper of mine.

Francis has never been that vocal when it comes to which church he opts. To him, they have their own appeal and look almost the same. Because of this, I've asked him to scout more options with me since I'm on a three-day holiday from work. Hurrah for my Aussie co-worker Kathy for covering for me. ;)

Tomorrow begins our journey to finding more churches starting with our sojourn to Paco Park and Adamson University. I know in my heart that I'm settled with Our Lady of Guadalupe Shrine. Sad, however, that Makati Parks and Garden will no longer be available for our wedding date. Darn the renovation and all the complexities that go with it!

On the sidenote, here's our current February schedule. Yes, I'm on my super sleuth act again to partner with my love in the coming venue misadventures.


It's just crazy! For this month, we have to do scouting, pre-nup conceptualization, bridal fair, meet-ups, and paper crane making. Whew! We ought to have a productive month ahead!

Posted on 2/7/12 at 10:04 AM

Saturday, February 4, 2012

Days 17-20: DIY STD and Fashion

Work has been crazy for the past weeks. I've gathered some videos in my browser's bookmark page for me to check from time to time. Here are four quick tutorials on several DIY wedding projects.


DIY Save-the-Date Magnets

DIY Wedding Earrings 

DIY Garters

DIY Save-the-Date Cards 


*** These videos are taken from YouTube. I do not own them. Credits to the posters.
Posted on 2/4/2012 at 6:23 PM

Wednesday, February 1, 2012

January 18 No More Among Other Brouhahas

Moving the Date: A Couple's Nightmare
Francis and I had to sit with his parents for the talk. Apparently, there is this Filipino custom called "sukob" that is believed to be a bringer of ill fate to couples. Since his uncle (Tito Oca) died January 18 (our anniversary) this year, we cannot marry after a year. That spells disaster to us.


We understand that there seem to be some things that we will not be able to control. Including this. It's just sad that we have to change our wedding date when January 18 is our 9th anniversary and 1+8 is 9. Pathetic? Yes, I do find myself deadbeat at times. But, numbers are close to my heart. Dates of special occasions are way too sentimental and memorable for me.


Good thing that January 28 is an available date for Vinz and VJ Matias. It's sad to know that we might not have these talented brothers as they are talented and very welcoming. I hope we settle everything by then.


Reception Renovation: F*ck Me!!! 
This is the biggest struggle we had to face as reception venue holds a very pertinent spot to the entire budget tier.


It is rather sad that Makati Parks and Garden is to be renovated; thus, no couple is allowed to book for any 2013 event. Sucks, I know! And since this is the case, we're on our super sleuth act again to look for the church that we will have our vows presented at. 


Arrrgghh! I promised myself not to be a bridezilla. I'm trying not to!


Posted on 2/1/12 at 8:24 PM

Tuesday, January 31, 2012

Days 14-16: Bouquet 101

One post, three different crafts, one must: flowers.


The bridal march will be nothing but complete with that perfect bouquet. I've dubbed myself to be a broke-ass bride-to-be and being one entails having a keen eye on where we'll put our money. To cut our expenses, we've agreed to plunge into the DIY wedding escapades everyone seems to have been raving about in the recent years. 


Our main idea of what our celebration would be is a warm party. Having every detail DIY-ed will seem to be challenging, but I must say that it's pretty much what we wish for. DIY essentials involve creativity and thriftstore sojourning.


My bouquet will surely place itself in our DIY catalog, which we'll start crafting this coming April. Hurray!!! *smiles widely* For now, I'll be concentrated on looking for affordable bouquet ideas. Like these three I've grabbed online!


A beautiful mesh of fresh flowers and handcrafted ones. Can you guess which is which?


How To:
1: Collect supplies. Use fresh flowers, handmade velvet flowers, berry twigs, feather birds, feathers and vintage brooches. A family heirloom ribbon (vintage tatting) and velvet ribbon can be used to personalize the bouquet!
2: Start from the center. Gather the fresh flowers altogether in the center and build the floral base of your bouquet. Work your way out by adding more and more flowers. This time around, surround the base with crafted flora.
3: Tape them. You will need to hold the stems together, so gently wrap the stems with floral tape. Make sure that not a single stem is let loose. 
4: Adorn. Use what creative heirloom pieces you have or crafted materials are there present! You'll be using feather birds and wires to have them wrapped accordingly. This fun part will all depend on your peg for your bouquet.
5: Use a trusty ribbon. Wrap the base of your stems with a pretty ribbon. Be creative and use other materials!
Courtesy of The Broke-ass Bride


Love is indeed in the air for this couple. I've fallen in love with this craft tutorial. I might make my own bouquet like this one! LOVE IT :)


How To:
1: Trace the hearts in your felt fabric. Using your cookie cutter or heart template trace out your heart shapes onto your felt.  We used a heart cookie cutter that’s about 3 inches tall.
2: Cut out your hearts. Do this carefully to ensure that the shape of the heart will not be jagged or difficult to re-shape.
3: Sew. Using your embroidery thread and a needle start stitching your hearts.  Make sure that the sides you traced on are now facing inwards so that you don’t have any pen/pencil marks on the outsides of your hearts.
4: Leave some space. Stitch the entire way around your heart, leaving about 3/4 of an inch near the pointed end of your heart.
5: Fatten it up. Gently stuff your heart with a small amount of batting.
6: Sew the stem. Take your clothe wire stem and make a tiny loop at the end. Place the looped end inside the heart and begin sewing up the last remainder of your heart while you wrap neatly around the stem as well.  The looped wire end will prevent your stem from coming out of the heart.  {{Note: If you don’t want long stems you may be able to cut your stems in half thus doubling your stem.  THERE! Your heart-on-a-stick is done! Make as many as you’d like depending on what sized bouquet you’d like}}
7: Tape the stemsOnce you’ve created all your heart-on-a-sticks you can start arranging them in a bouquet.  If you’re on your own, use some floral tape to help secure the placement of each heart.
8: Ribbon time. Once you’re happy with your arrangement, you can add your ribbon.  Using a glue gun (sparingly) being wrapping your ribbon around your stem.  Use whatever width and texture of ribbon you’d like!

Courtesy of Labelle Bride


Burlap bouquet wonder. Perfect for that rustic vintage wedding theme! Oh! DIY magic! Oh that magic!


How To:
1: Cut. Cut a strip of burlap about 2 inches thick and a foot long (depending how big you’d like your flowers).
2: Paste. Take your stem and glue the tip of it onto the very end of your strip.
3-4: Roll. Begin to roll your stem into the burlap, gluing along the way. Continue rolling your stem about 4-5 times. This creates the center “bud” of you flower.
5-6: Petal folding. Now it’s time to start your petals! Take the fabric strip that is dangling from your “bud” and make a fold away from you, holding the bottom of the folding piece close to the stem. Overlapping your first “petal” slightly, create another backwards fold or petal. Again, holding the bottom of the fold near the stem.
7: Paste. Glue your first two petals in place. Try to put the glue closer to the base of your flower.
8: Repeat. Continue steps 5-7 until you’ve completed an entire row of petals all the way around.
9: Tighten it. Poke your glue gun in here and there to secure the flower
10: Base foundation. With your remaining fabric you’ll now secure the base of your flower and the top of your stem by winding the fabric around, gluing when appropriate.
11: Tada. Voilà! Your little burlap flower!
12: Adorn. Now personally I like these flowers just on their own, but if you’d like to add a little color to your bud you can add a small piece of ribbon and a pearl pin in the center. If you’re making a bouquet like in the first photo, assemble a few burlap flowers, trim the ends and wrap with ribbon. It’s THAT easy.
Courtesy of Labelle Bride

Such amazing finds, right?


Sources: The Broke-ass BrideLabelle BrideLabelle Bride (again)
Posted on 1/31/12 at 1:10 PM

Saturday, January 28, 2012

Ocular: Makati Parks and Garden and Our Lady of Guadalupe

We had a very busy Saturday with Francis barely sleeping as he just went home from work. It was pretty manic if you'll ask me.


At exactly two in the afternoon, we went straight ahead to Makati Parks and Garden to check it out. While on the way there, we were able to spot a chapel that is almost worn and torn. It's actually perfect for an intimate wedding due to its solemnity. San Nicolas Chapel in J.P. Rizal Ext. is quite a catch for our supposed set-up; however, the lack parking space is a definite no-no. 


Though the mini church sits across Makati Parks and Garden, it is rather inconvenient to have the guests walk from one side to another (taking into account the fact that they need to use the footbridge to cross the street).


After speaking with a certain Ate Eba from the San Nicolas Chapel, we went to Sta. Tererista Parish (the main parish in West Rembo) to have a look at what they can offer and see the caretakers. Ate Beth greeted us there, and she was actually all warm and fuzzy. The only problem we had was that it's very difficult to find. Something that could be a pain in the ass for us and the rest of the attendees.  


The offer was 7,000 PHP inclusive of the priest's stipend, flowers, red carpet, and use of the church for the ceremony.


Failed on choosing this church, we decided to check Makati Parks and Garden then proceed to Guadalupe Nuevo's Our Lady of Guadalupe Shrine
Photo take from Shutter Bride


The security guard, Ate Gilda, was in the Pavilion and told us to inquire to their admin office (which, by the way, was not helpful at all!). Had Francis and I been a different kind of couple with loads of gran, we would have crossed this out immediately because of the staff's unfriendly welcome. 


Photos from Venues.Multiply.Com


Luckily, we got the contact details of a certain Claudine Magno from Makati's Office of the Mayor


Next, we rode a jeepney back to Guadalupe, Makati. We walked and walked until we reached Orense St. in Guadalupe Nuevo. There stands the beautiful Our Lady of Guadalupe Shrine. It's a fascinating shrine perfect for our occasion! It's not that big but not too small.


The church staff, Kris, was very friendly and polite in answering our inquiries. She gave us the list of requirements and fees, plus their contact details. As per Kris, we will have to coordinate with Rovi and return in June. 


To be honest, I was enthralled when I saw the church. It's not as beautiful as other churches like Jon Don Bosco and St. Andrew in Makati. Nonetheless, I'll have to say that it's a solemn place to hold our special ceremony. The rate? Well, it's amazingly within our budget. A little less than 10,000 PHP with all the other inclusions.


Here are the pictures. We only had a chance to sneaked in and press our shutters.


Me in the altar and him from the farthest point

The angel is very welcoming if you ask me


These babies should be lighted on our wedding day

The tablet inside

I really fell in love with this church in an instant! Francis spoke about how quiet it is in the area. It's perfect! Just perfect for our uber budgeted wedding celebration! Can't wait to check Makati Parks and Garden's availability, so we can book this church! Yey!

Posted 1/29/12 at 5:29 AM

Day 13: Memoir-filled Guestbook (Check!)

Going over Internet articles and how-to instructions has been my recent addiction. I can't help raving about these fantastic DIY projects. For instance, I've been lurking in forums finding cheap options to cut our wedding budget. With just 100,000 PHP in our plate, Francis and I know that it'll be one heck of a trip to the thrift shop.


The guestbook is not as salient as other weddings musts (i.e. wedding gown, rings, reception, church, and food). This, however, doesn't mean that we'll take this piece for granted. Your attendees may have pretty much to say to you, and what better way to have them voice their opinion than to allow them to sign your guestbook. 


Mind you, there are thousands of "craftastic" ideas out there in the open (waiting for you to discover). Take for example this amazing scrapbook idea, which I may implore as our guestbook inspiration.


The scrapbook

Materials
3 sheets solid cardstock 8-1/2" square
2 pieces patterned paper 5-1/2" square
2 pieces chipboard or cardboard 4-1/2" square
Four different coordinating papers cut to a little less than 4-1/4" square. You will need a total of 10 squares to cover the inside squares of the book.
Ribbon, 1 yard
Embellishments and photos of your choice.

OR
3 sheets solid cardstock 12" square
2 pieces patterned paper 8-1/2" square
2 pieces chipboard or cardboard 6-1/2" square
Four different coordinating papers cut to a little less than 6-1/2" square. You will need a total of 10 squares to cover the inside squares of the book.
Ribbon, 1 yard
Embellishments and photos of your choice

Steps
1. 
Folding: Take the paper and fold in half lengthwise in one direction and repeat it in the other direction. Make sure that you'll be forming a cross by meeting the center. Try folding the paper (from lengthwise) to form a mountain. Do not repeat the step as you should only create one diagonal fold. Do the folding to the other sheets of paper.


2. Overlapping: Put the far right square of one piece atop the middle sheet of paper, and then link the middle sheet to the last piece. Glue the pieces tightly. Note that you have to turn the pieces of paper to produce that diamond shape before putting the paper together.

3. GluingUsing a hot glue gun, glue the 5-1/2" (or 8-1/2" if doing the bigger book) square pieces of patterned paper to the chipboard. Cut the corners diagonally and fold over edges. Glue these down and you get a nice professional finish. Glue one onto the front of your book. For the back of your book take your other piece of covered chipboard and place it upside down. Glue ribbon to it centered, and then glue ribbon side to back of book.

4. Decorating: Embellish the cardboards with whichever design you choose to!


Source: Making Mini Scrapbooks
Posted on 1/28/12 at 6:43 AM

Friday, January 27, 2012

Day 12: Tissue Paper Carnations (Check!)

As a DIY queen wannabe, I've particularly decided to replace fresh flowers with tissue paper versions. For one, these beauties can last and I can re-use them as decorations for our future love nest. Likewise, my friends and I can all participate in the preparation.


I'm not really a demanding kind of friend; however, weddings just bring out the hidden "you." By spending time with them making crafts, I can further our friendship and help them have peso-saving ideas for their own wedding in the future!


Here's a simple DIY project involving carnations. Photos and idea courtesy of Folding Trees:
The project. Tada!


Materials:
Tissue paper
Scissors
2 large paper clips
Pipe cleaners (chenille stems) or floral wire
Coloured marker pen
Optional: floral wire, floral tape, wire cutters

Please visit Folding Trees for the step-by-step guides.


Source: Folding Trees
Posted on 1/27/12 at 6:43 AM

Thursday, January 26, 2012

Quick Update: NSDG Guadalupe and Makati Parks and Garden

Just a few hours ago, I received a call from Francis regarding his conversation with the admin staff of Nuestra Señora de Gracia Church in Guadalupe, Makati City. As per their conversation, he found out that the fee there is now 15,000 PHP, which is a little beyond our budget for the church ceremony.


The staff was friendly and attentive to my fiancés inquiries. He discovered that they do allow pencil booking but on the note that you will reserve the slot within the one-week period. The package includes the ceremony and adornment less the choir. This now is a problem in our case should we go ahead with this option.


As per the not-so friendly admin attendant in charge of reservations at the Makati Parks and Garden, inquiries will only be attended to every Monday to Wednesday. They sure as hell have some sharp tongue to lash out such unfriendly response. Nonetheless, we'll still try giving it a go depending on what we will see tomorrow.


Keeping our fingers crossed! Gaahhh!!! This is just so nerve-racking.


Posted on 1/26/12 at 8:42 PM

Day 11: Table Numbers

Table numbers, along with other paper craft ideas, pretty much enlighten every wedding party. With a touch of creativity, you can turn that dull numerals into a set of chic and cozy paperwork. Here's one good deal of tutorial I grabbed online.
Chic and comfy


Materials:
Color printer
Card stock in color of your choice, 8.5" by 11"
Paper cutter or scissors
Gold acrylic craft paint
Fine paintbrush


Steps:
1. Table number templates 1-20 are available as .pdfs to download and print.
2. Print table numbers onto card stock and cut out along provided lines.
3. You can use the table numbers as is or add extra metallic details with gold craft paint and a fine brush. Use the paint to detail the floral border. Be sure to keep the brush relatively dry, especially if you've print your cards on an inkjet printer.


Oweee! I can't wait to try this. I'm just wondering if I'll forgo numbers and go with attributes or keywords instead.


Source: Project Wedding
Posted on 1/26/12 at 6:43 AM

Related Posts Plugin for WordPress, Blogger...